As my previous post discussed, I had some inspiration this week as to how to resurrect the Kitchissippi-Delta 3D printer from it’s previous self-destruction.
I have no doubt of the issue with the mechanism skewing could have been avoided by using a better adhesive to attach the rod-ends which form the clevis joints to the aluminum rod stock.
With this in mind, as I redesigned the parts, I also selected what I thought would be a more appropriate adhesive to attach them to the rods. I had on hand some Elmer’s Fix-All which has served me well in the past, so I built the rods up last night with this glue. It was a better selection than the hot-glue that was used on the original prototype, but only slightly it seems.
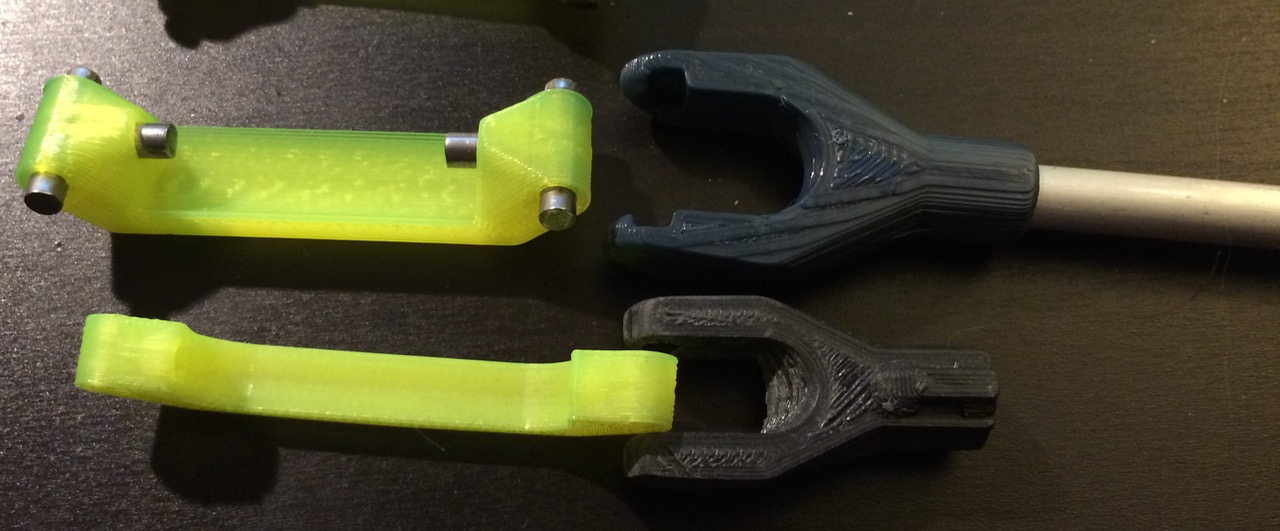
The upper swivel arm and rod-end clevis part is my inspired revision for this assembly. The lower swivel arm and rod-end clevis part are from the previous build. Although the basic design concept remains unchanged, the upper parts clearly show how the design was expanded and smoothed in OpenSCAD to form a more solid assembly.
To my dismay, there seems to have been some spoilage to the Fix-All glue, possibly due to a broken cap – the setting properties were not as they should have been. After twelve hours the glue was still soft and not even close to curing, much to my dismay.
I pulled off the worst of the problematic rod-ends, cleaned the metal with alcohol and scuffed the ends up a bit with a rough sanding block, with the hope I could repair those ends and get the parallelograms built out. I quickly found out this was folly, since some accumulated glue within the rod-ends preventing the cleaned rods from reaching full insertion, thus creating random lengths on the delta arms. Needless to say, this is not something you want – especially after spending much time hand-filing and sanding hand-cut rods to the exact same length. Ultimately this was a bad choice of adhesive, the ends that did cure pulled out with a bit of force – but not what I’d consider excessive and nowhere near the amount of force that could be imposed by three NEMA17 motors working together.
It became clear that I was going to need to pull all of the rod ends off and refinish the ends of the rods and reset them into newly printed parts. I took this as an opportunity to refine the OpenSCAD model for the rod-ends. The new model has some rounder edges, sleeker lines and more of a taper around the rod. I also introduced a new feature, which is an integrated pressure-relief channel to aid installation. Essentially this is a tiny hole at the end of where the rod gets pushed into that exits out the centre of the other side.
This pressure-relief channel allows excess glue and air that gets trapped when the rod is forced into the component to have somewhere to go, allowing for a tighter fit.
I decided to use some 5-minute epoxy this time. It should bond well and also was on-hand.
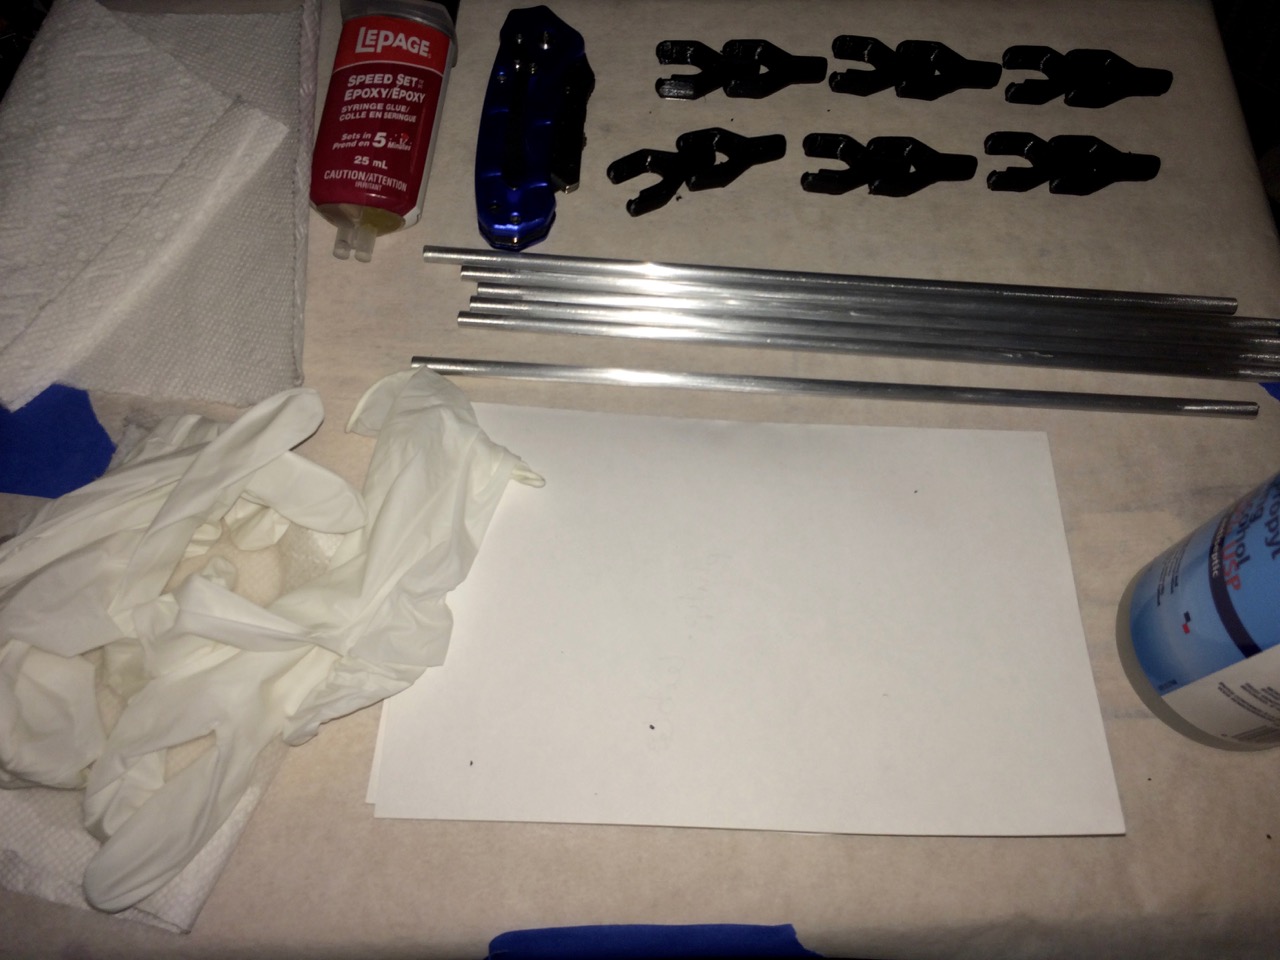
I don’t work with Epoxy much, it’s messy and quite toxic, but I spent a few minutes preparing a work area. As shown above, I have all of the rods and the newly printed rod-ends ready to go near the top right. On the bottom left are nitril gloves to prevent contamination of the rods after cleaning with the alcohol on the right as well as to protect my skin from the epoxy. Not shown are some bamboo skewers I used to mix and apply the epoxy.
I cleaned the rods thoroughly with rubbing alcohol to remove any skin oils that may be on them from handling and the ends were previously roughed up with a sanding block.
I had some trouble getting both sides of the epoxy syringe to flow evenly, but I persevered with getting the two chemicals to extrude onto the piece of paper and then proceeded to mix as best I could using a piece of bamboo. I carefully rubbed the epoxy around the inside of the printed PLA rod-ends and then pressed the rods in as far as they would go. For each rod, I then pressed them flat and level on the smooth sides created by the first layer of the 3D print. The pressure-relief holes proved their worth, allowing air and excess adhesive somewhere to go so that the rods could fit all of the way in.
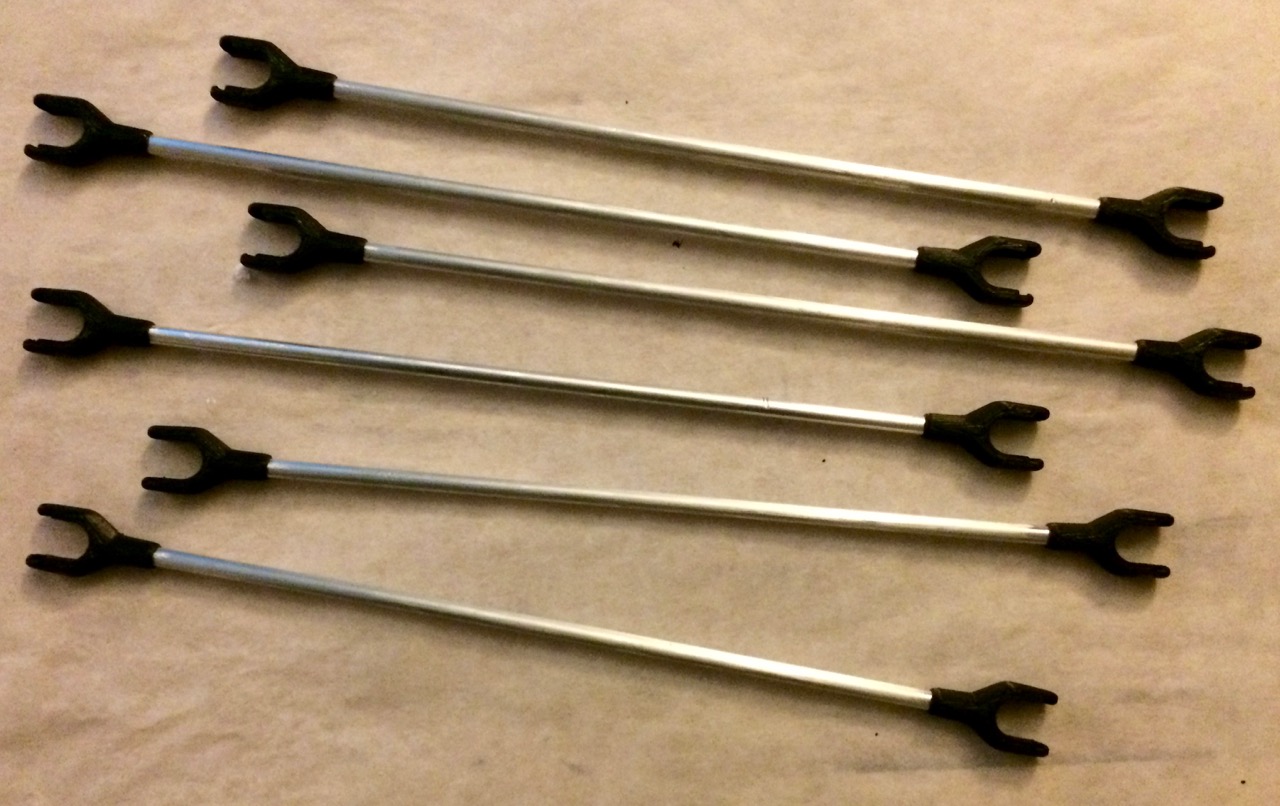
The assembly process concluded without incident – above are all six rods with their ends firmly attached.
It seems that misbehaving adhesives are the theme for this week – the “5 minute” epoxy is still tacky hours later. I suspect I got the mix wrong due to the syringe not pushing out an even mix. I’m not in a particular rush so I’ll let the rods sit overnight and re-asses the situation tomorrow. Perhaps it will set, or perhaps I’ll need to yet again print 12 more rod-ends and try another adhesive. I have some Gorilla Glue and some J-Weld on hand, either of which are contenders if the epoxy fails.
Recent Comments