by B Cantin | Mar 26, 2015 | Gemini 3D Printer
After getting several good prints while tuning the Z height detection mechanism that is the core reasoning behind complicating the Hotend Chassis of the Gemini printer, I started working on the Smoothieware settings that seemed to be causing some grief when attempting to raise the print speed.
At this point I’d like to put out a big shout out to one of the core Smoothie guys on #smoothieware IRC – wolfmanjm. He confirmed for me that I was on the right path yesterday for resolving my Z axis trimming settings in the firmware as well as gave me some invaluable tips today for tuning the acceleration settings for corexy to bring the speed up.
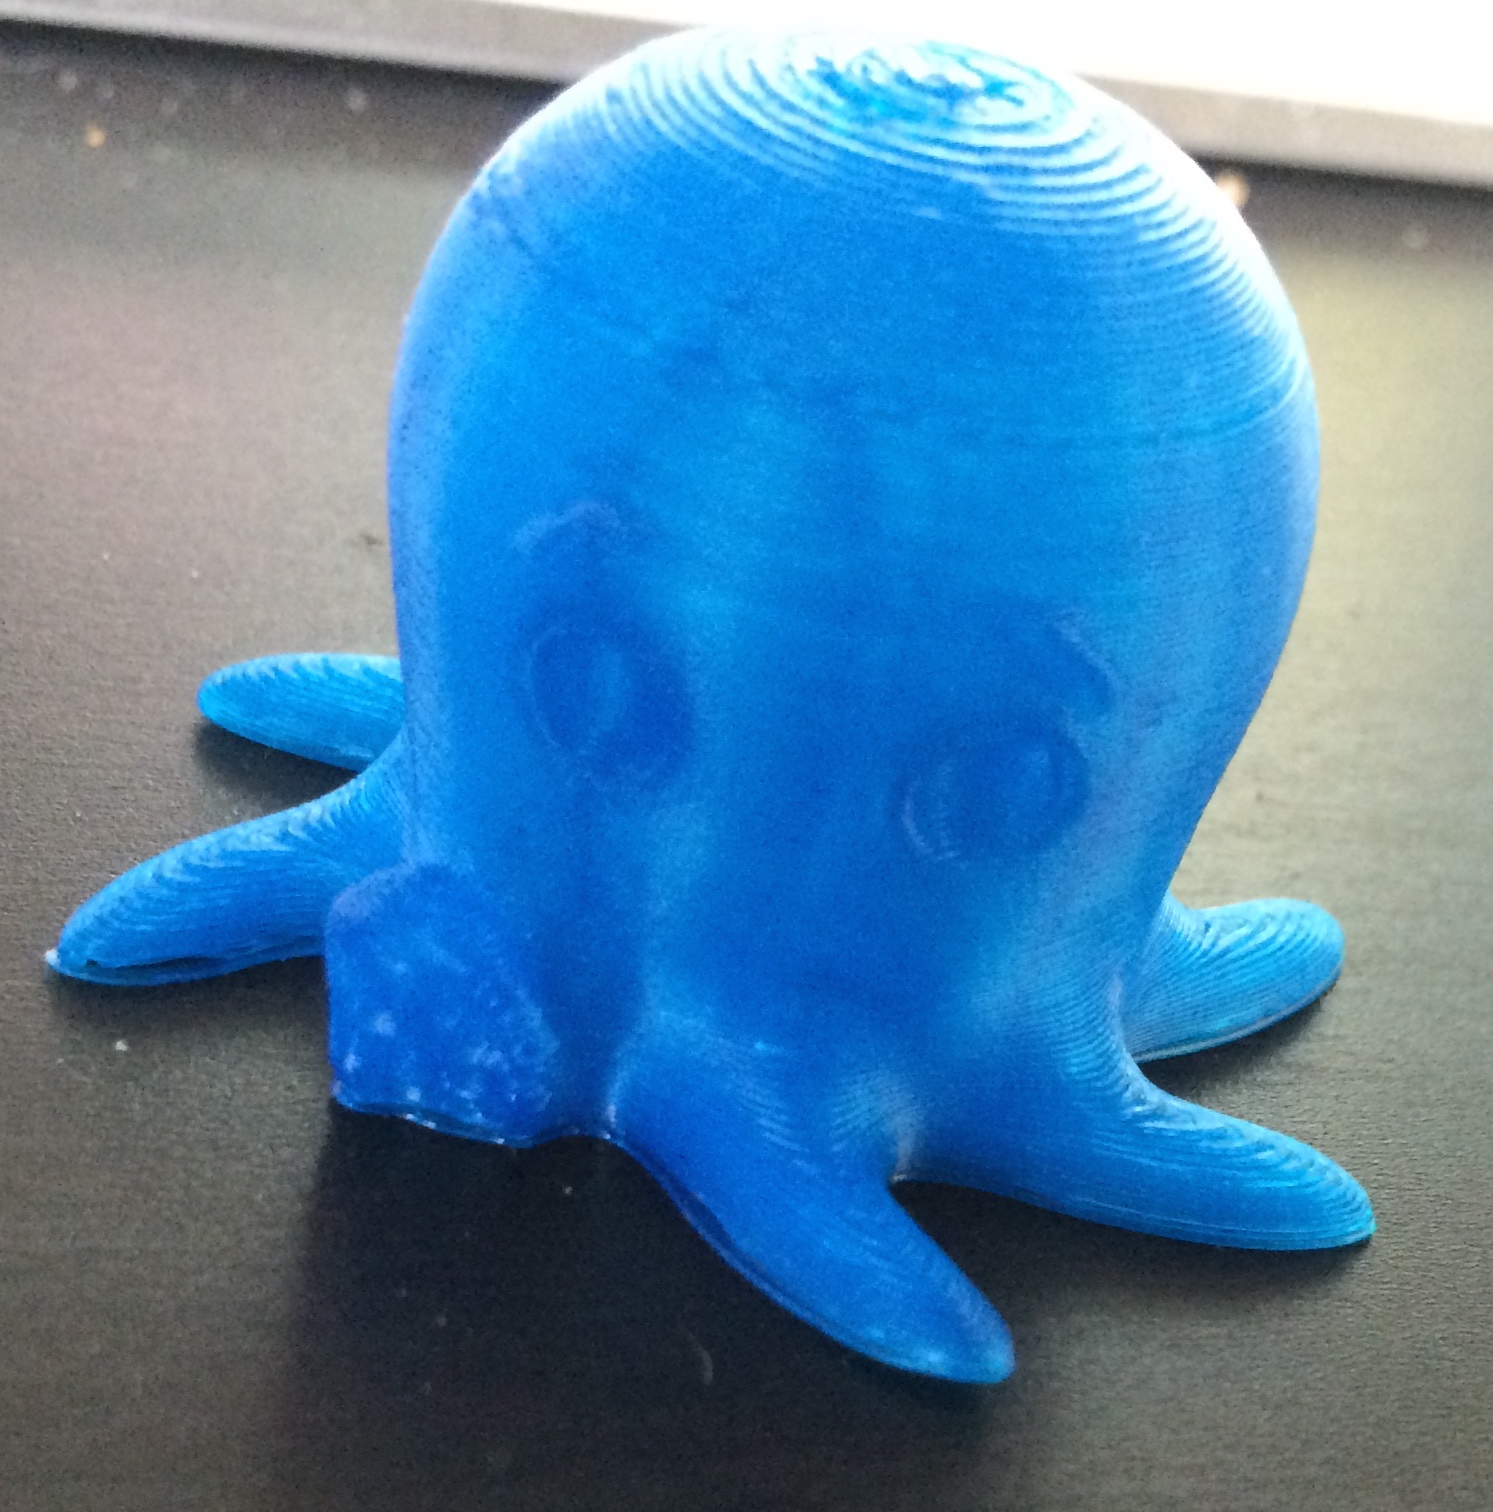
The results are wonderful. In the below photo, I have the “Cute Octopus” from Thingiverse scaled down 50% and printed with two perimeters at a 0.2mm layer height in the same PLA plastic.
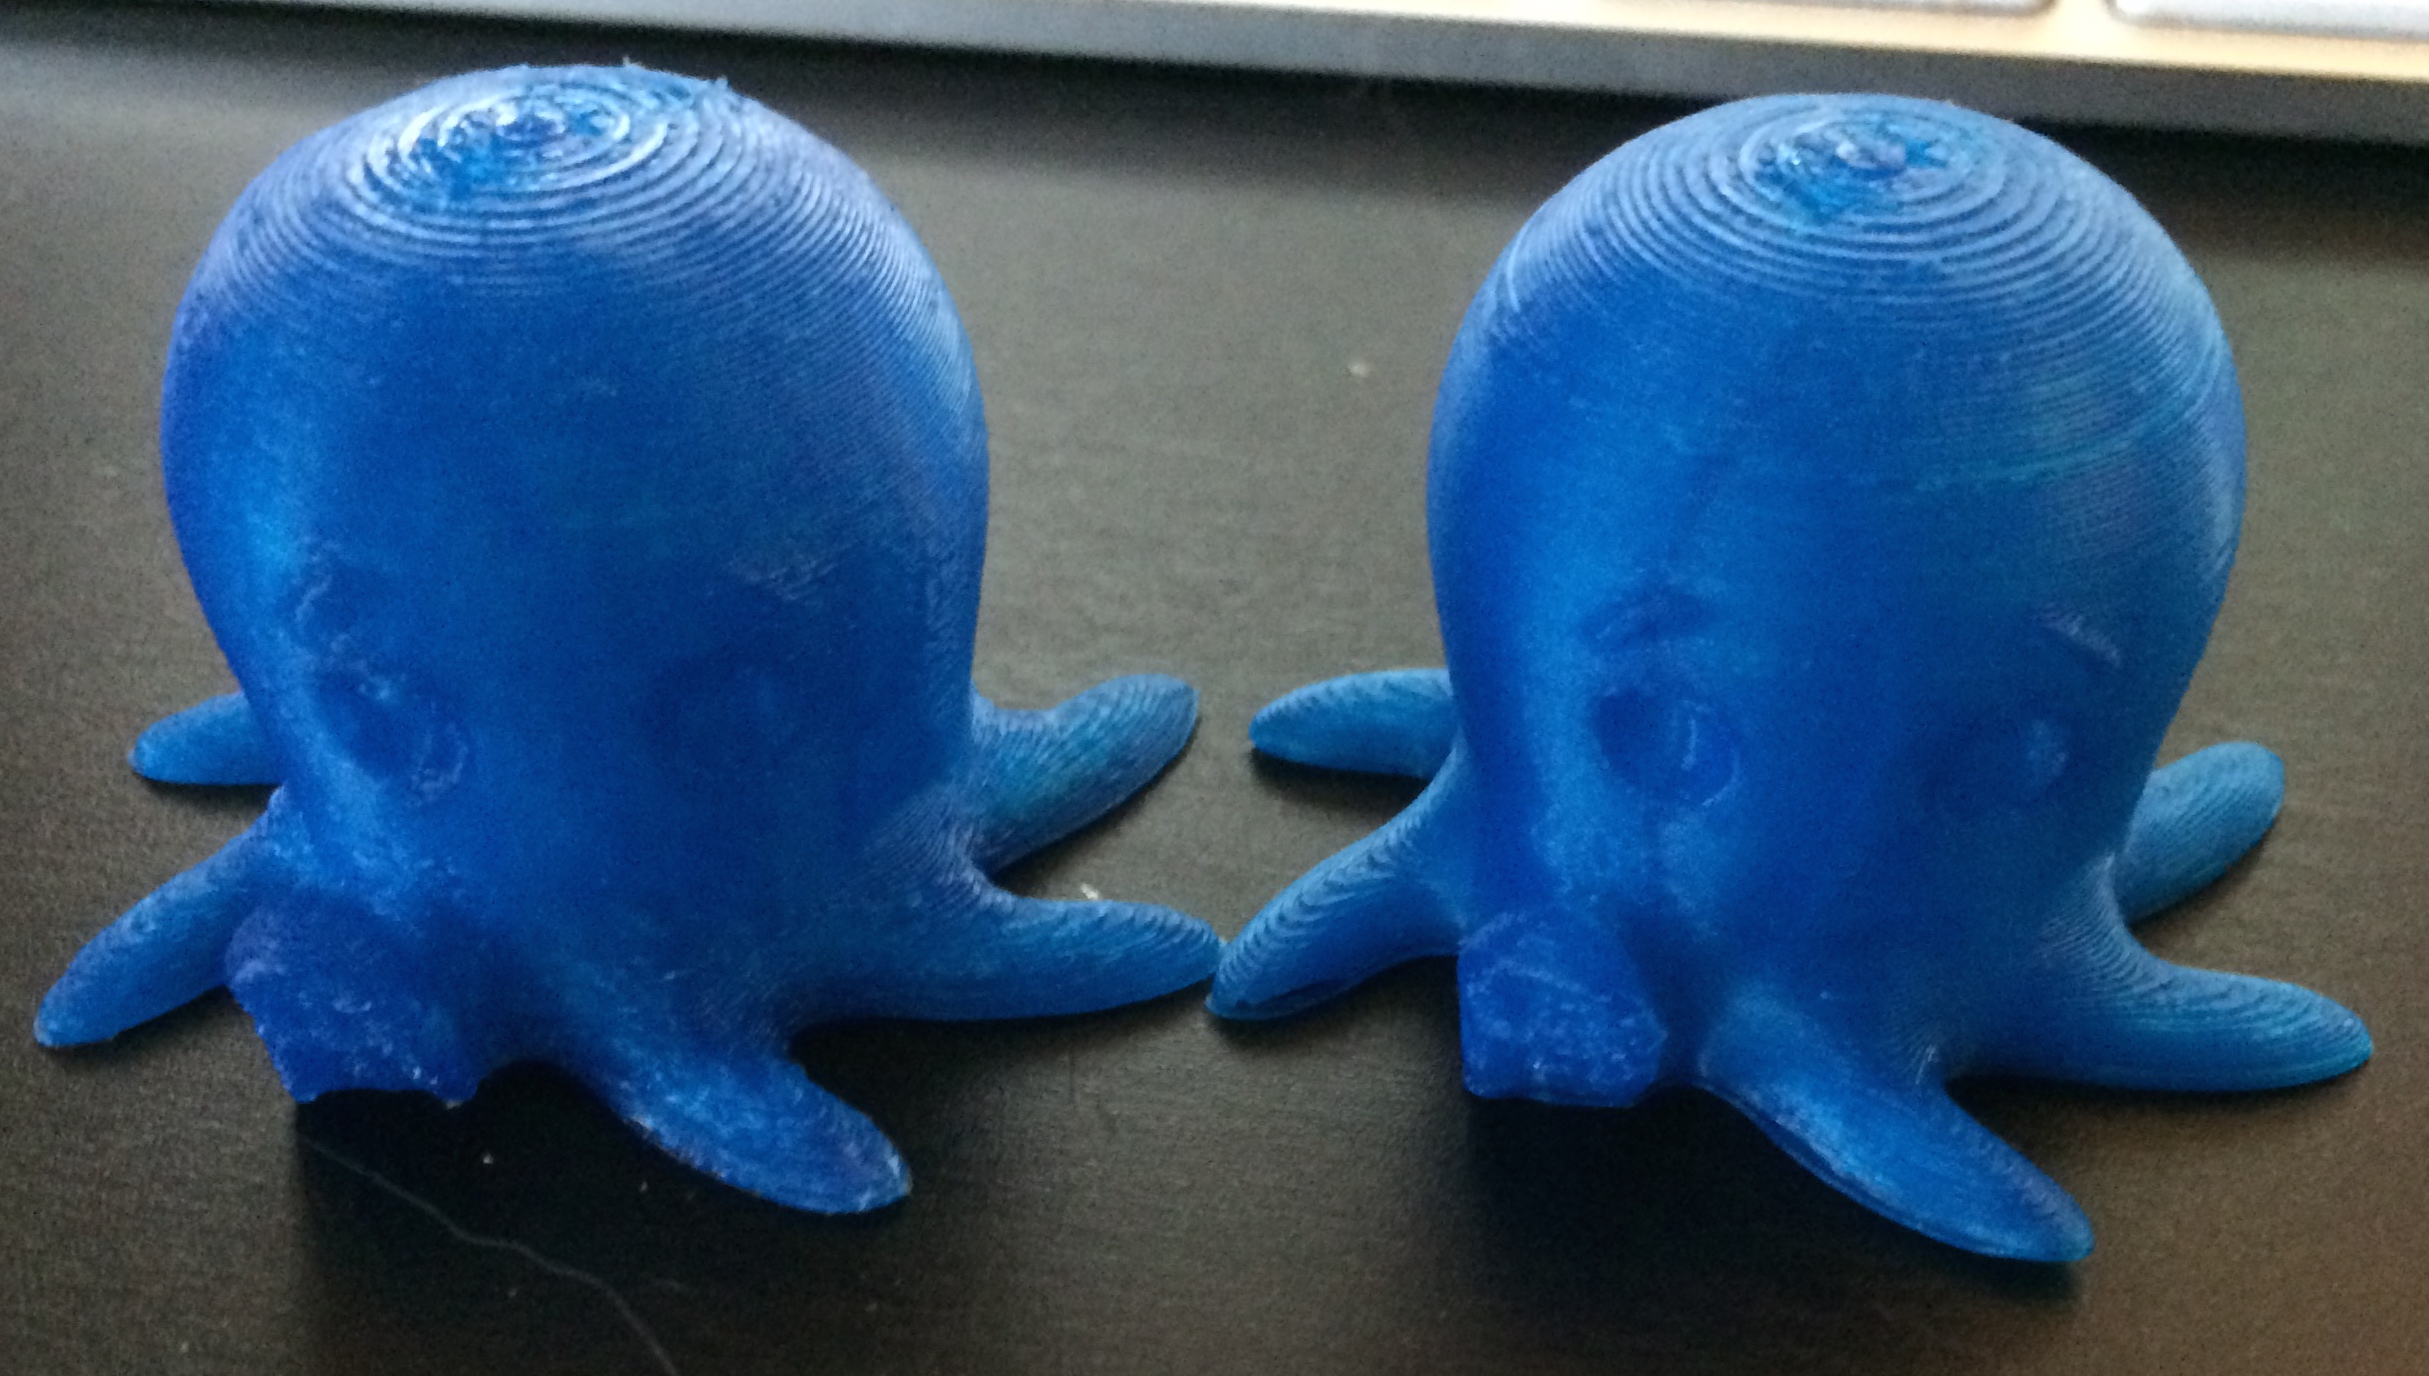
The one on the right was printed at 30mm/s for infill, outer perimeter and inner perimeters. It looks nice and took about 35 minutes to print.
The left octopus was print at 120mm/s for infill, 80mm/s for the outer perimeter and 100mm/s for the inner perimeter and took 22 minutes to print.
While the right one is obviously a cleaner output from the machine, the left one is still quite nice and a lot better than some of the prints I’ve seen. My other machines could never hope to produce something so nicely at these speeds.
Also note, this was the first try – I only changed one setting, so more tuning can and will be done.
For contrast, this blobby looking print was done at 60mm/s for all speeds, before I adjusted the acceleration configuration:
Things are progressing quite nicely.
by B Cantin | Mar 26, 2015 | Gemini 3D Printer
After rebuilding the extruder’s filament pusher three times due to it’s penchant for ejecting the pneumatic pushfit connector, I was finally able to get it to behave, at least at lower speeds. I’ll be designing my own instead of using an existing design at some point since the current pusher is simply too unreliable and badly designed to consider using at the speeds the Gemini is capable of.
However, all that being said – it was time to test the machine out on a larger and longer print.
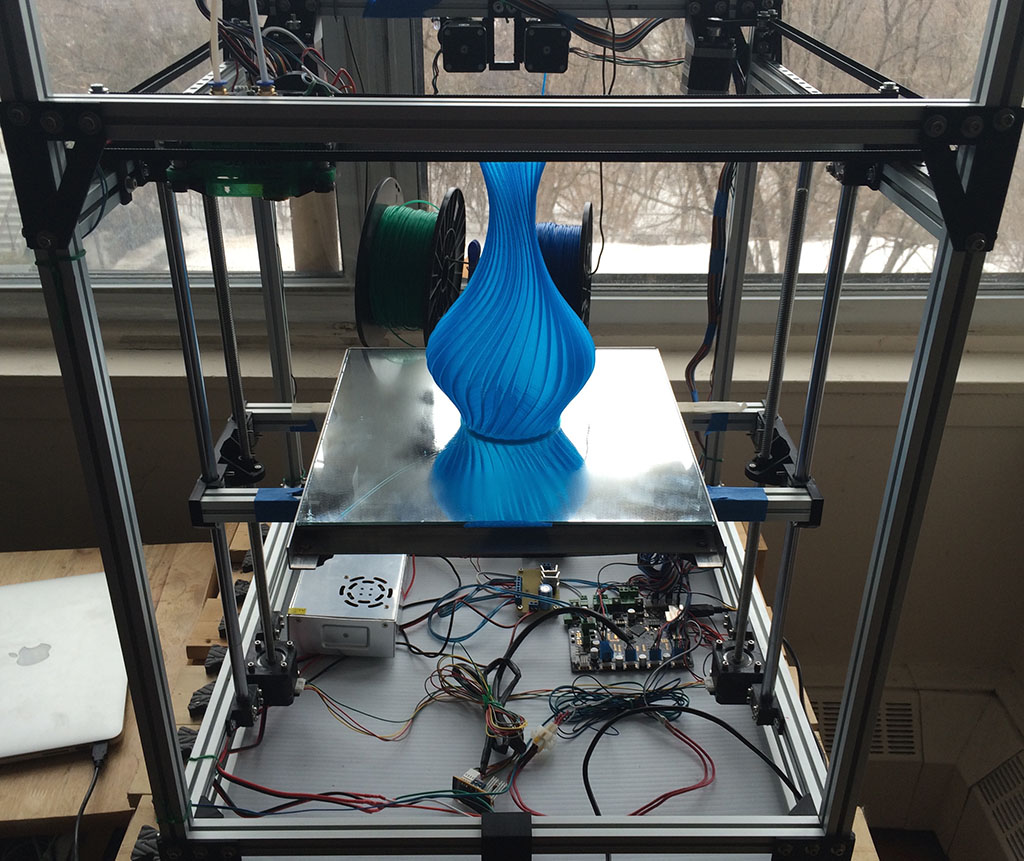
This vase is 228mm tall, and 143mm in diameter. It was a test for bed levelling (larger prints need a very level print bed), Z endstop calibration (due to the methods used, there needs to be a software adjustment made to find the correct zero point) and positioning consistency.
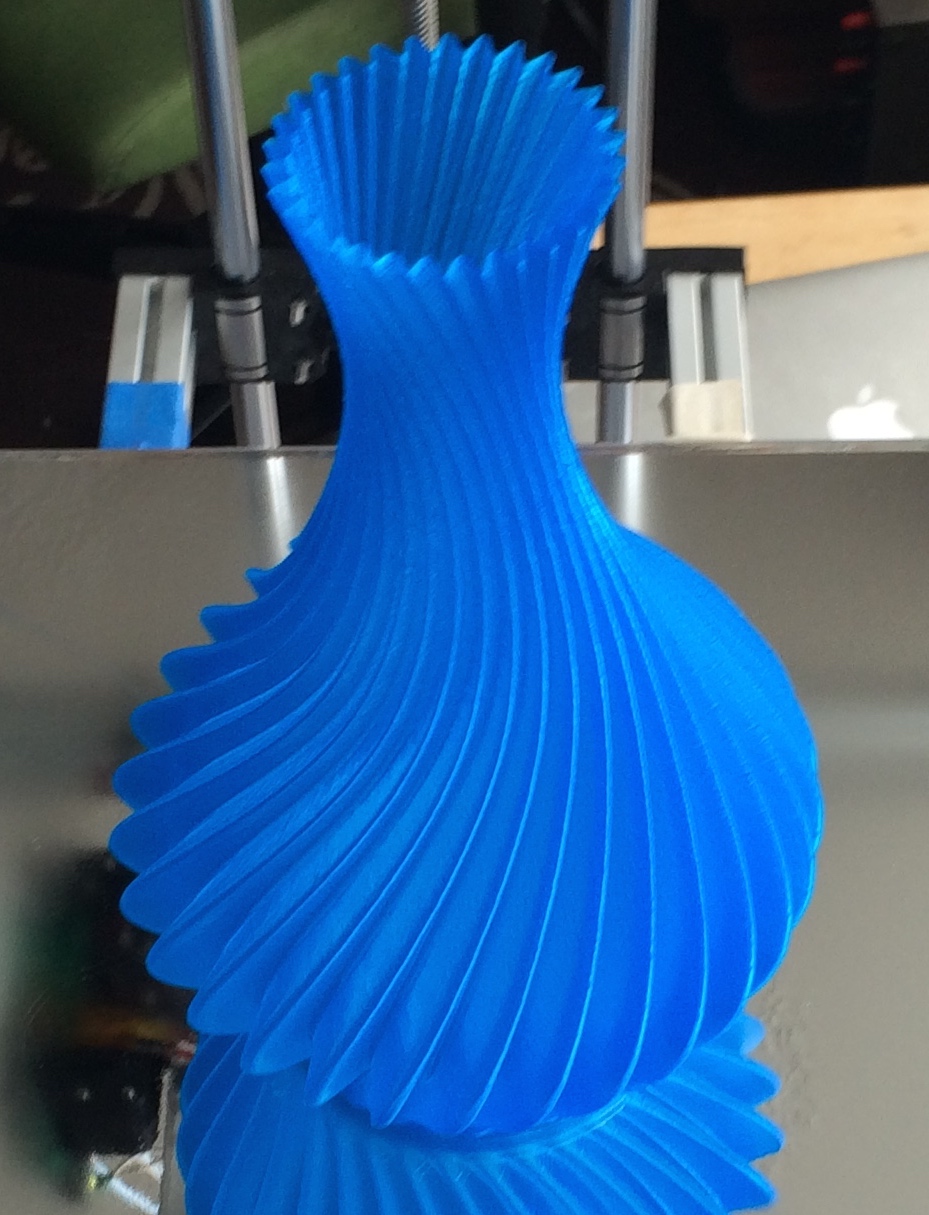
As you can see, the Gemini prototype is performing quite well!
by B Cantin | Mar 26, 2015 | Gemini 3D Printer
Although there is some work to be done still in terms of getting everything configured within the Smoothieware so that the Gemini 3D printer is working optimally, it’s already proving itself capable of making some nice prints:
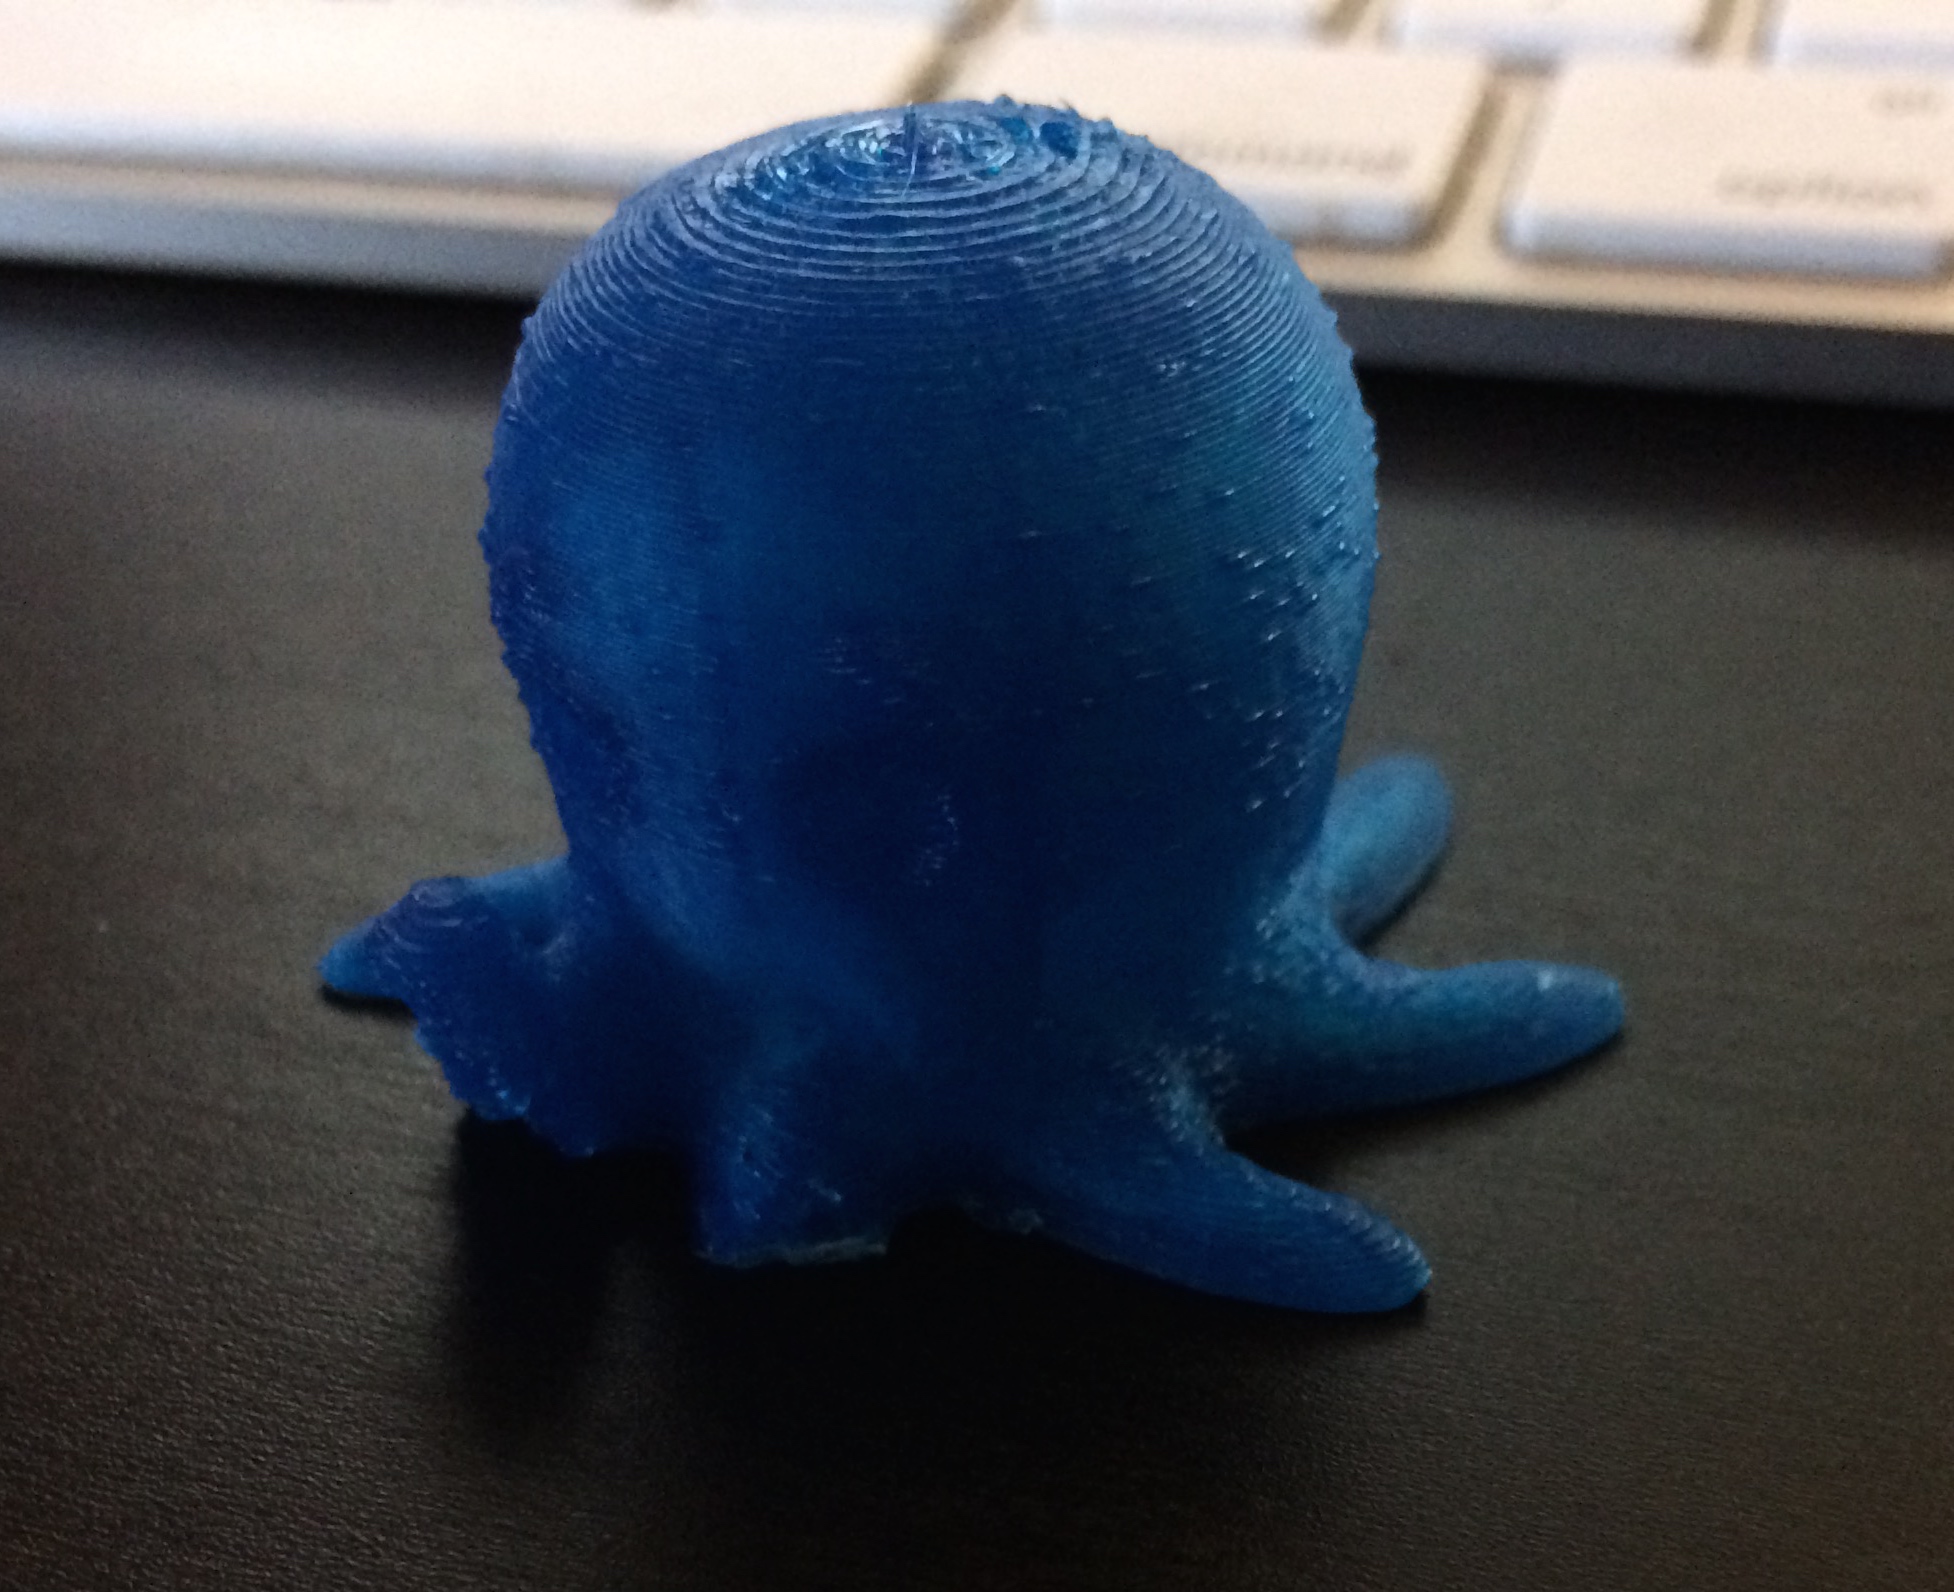
This little guy was scaled down to reduce print time at the low test speeds I’ve been working at initially. This was done using a sky-blue 1.75mm PLA with 10% infill, 0.2mm layer height and 30/mms speed.
On my Mendel i2 printer the outer perimeter speed needs to be printed slower than the interior perimeters and infill in order to produce such a smooth outer layer – the Gemini required no such consideration, clearly demonstrating the benefits of the corexy movement and linear rails.
There is a slight layer glitch near the top – this was caused by the laptop controlling the printer going to sleep state. I was nearby and was able to resume the print quickly, however it did produce an artifact on that layer as a result.
At higher speeds there are some issues with the acceleration settings within the configuration file as well as some serious drawbacks to the filament pusher design. I’ll be working on increasing speeds and then designing my own extruder for the printer to resolve these issues and get the machine running at it’s true potential.
by Brian Cantin | Mar 25, 2015 | Gemini 3D Printer
As with all printers, after assembly and initial electronics testing, it becomes time to print calibration cubes.
This simple step cube came out fairly well, especially when you consider that I made a mistake when slicing it in Cura and forget to put in any infill.
Since I was testing the extruder and some other factors out at the same time, I decided to let it run and was pleasantly surprised by the machine’s ability to bridge the PLA and create the shape despite having no infill to support the next row of cubes.
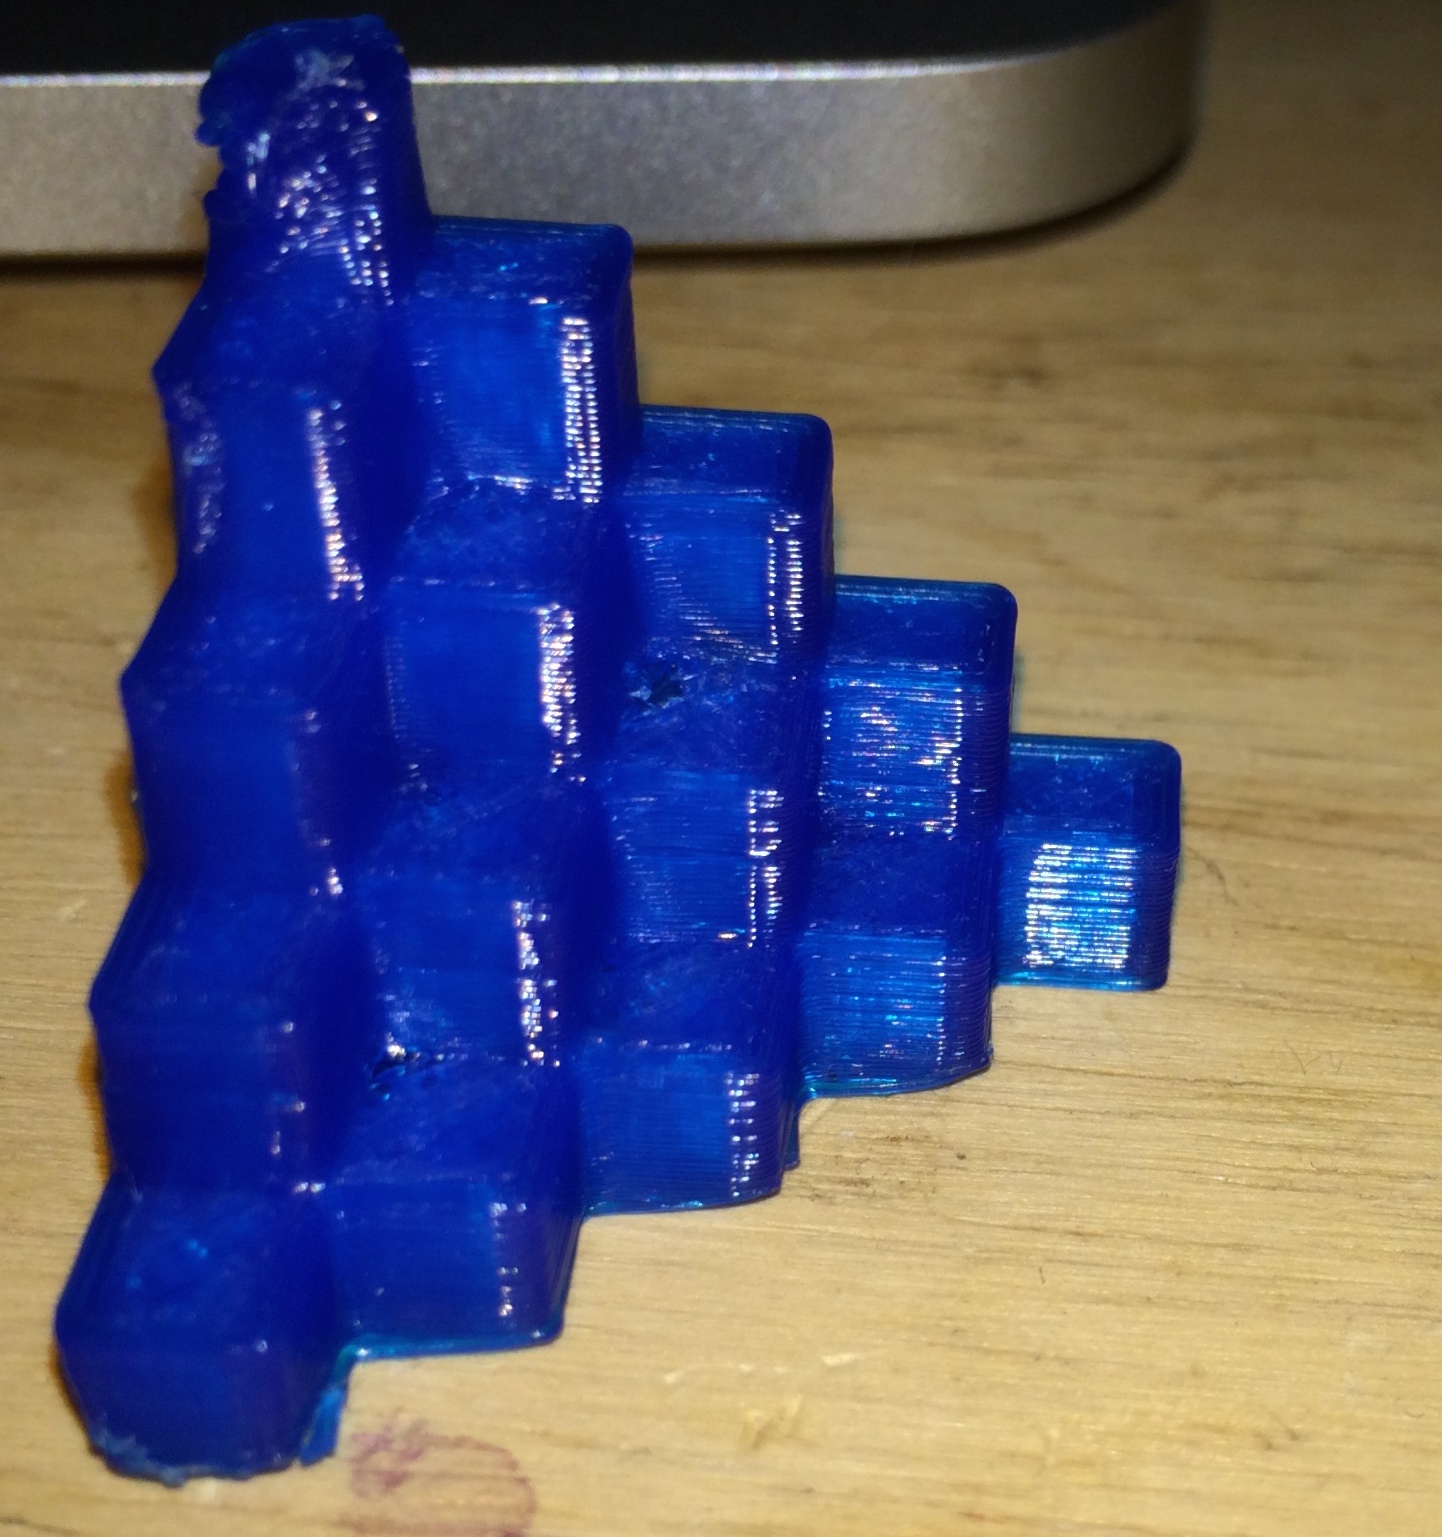
One thing that is evident is that the blower that is channeled through the bottom of the x-carriage assembly is definitely doing it’s job, but needs a slight modification in range of the print it blows across. Note the top tiny cube is fairly straight on the right side, but melted and distorted on the left side.
This is due to the blower only cooling the print from the right, the left side blower is beside the other nozzle and unable to cool the plastic on that side.
Some redesign of how that works will be needed.
As a side note from the testing done last night, I will eventually need to move away from the modified AirTripper style extruder to something more custom for this machine. Higher print speeds causes the filament to kink within the gap between the pinch roller and the pneumatic fitting and jam up the whole works.
by Brian Cantin | Mar 20, 2015 | Gemini 3D Printer
Just a quick note that partial documentation on the Kitchissippi Gemini 3D Printer is now online here.
As the parts finalized for the current build they will be listed and displayed in the Printed Parts section.
Some items for the Bill of Materials section will be put online within the coming days, mostly generic things like the necessary stock of certain metric bolt sizes and the 2020 aluminum extrusions used for the frame which is unlikely to change any time soon for this build.
As always, any questions can be addressed to novakane on the freenode #reprap IRC channel.
Recent Comments